GitHub Desktop
GitHub Desktop is an open-source application that GitHub created to make working with Git less complicated. That makes GitHub Desktop a great option for those who may be new to using a version control system to collaborate on projects. For researchers with more experience using version control and the command line, or if using a Linux operating system, you may be interested in trying GitHub CLI.
In the following steps, we walk through how to configure GitHub Desktop for your own computer(s) and GitHub user account. If you have not created a GitHub user account, we suggest setting that up before GitHub Desktop.
note
GitHub Desktop is only available for Mac OS and Windows. You can read more here about which operating systems are supported for GitHub Desktop.
Installation#
To install GitHub Desktop on your computer, follow the instructions in the official documentation, selecting Mac or Windows (depending on your computer's operating system).
After installation is complete, open GitHub Desktop. The next step is to connect your GitHub user account with GitHub Desktop.
note
The screenshots on this page were created on a Mac computer, but all instructions are written for both.
Connect your account#
- macOS
- Windows

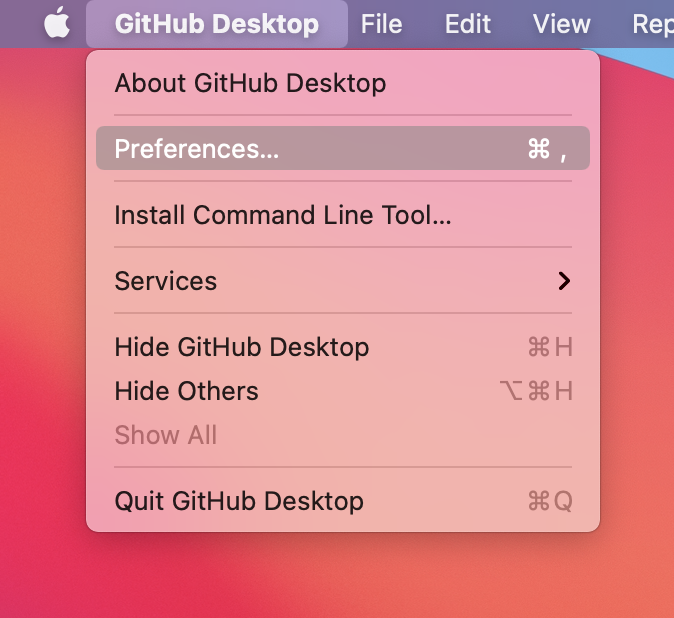
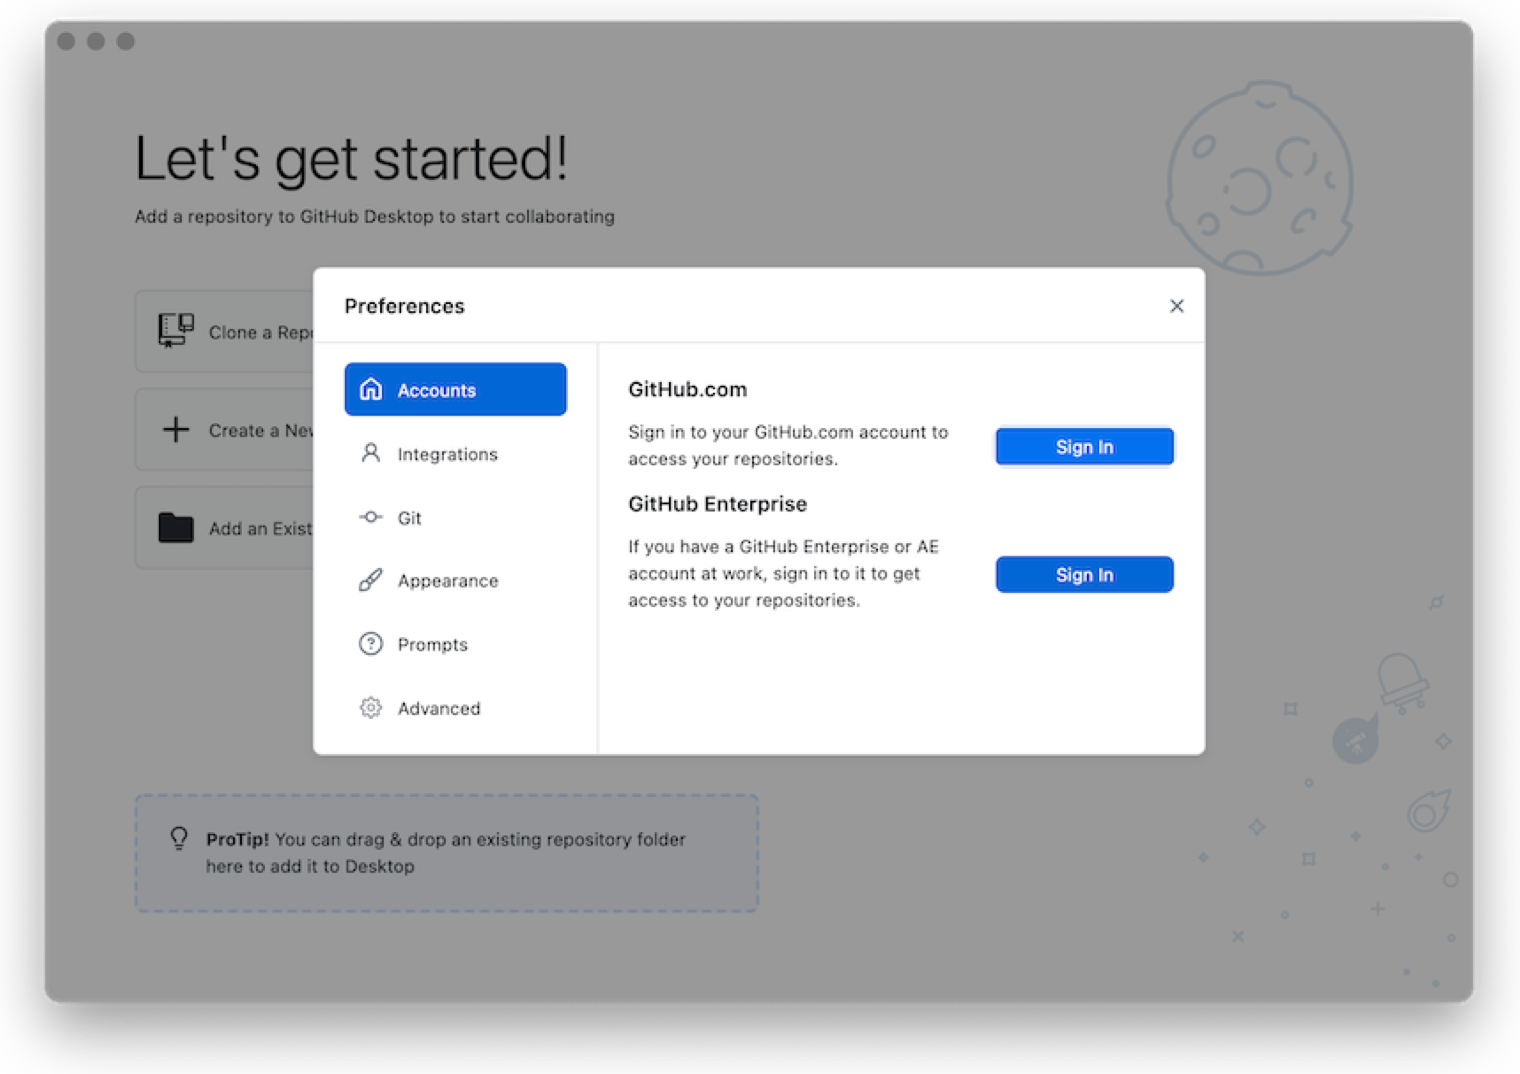
In the preferences window, select Accounts and click the Sign In button for GitHub.com.

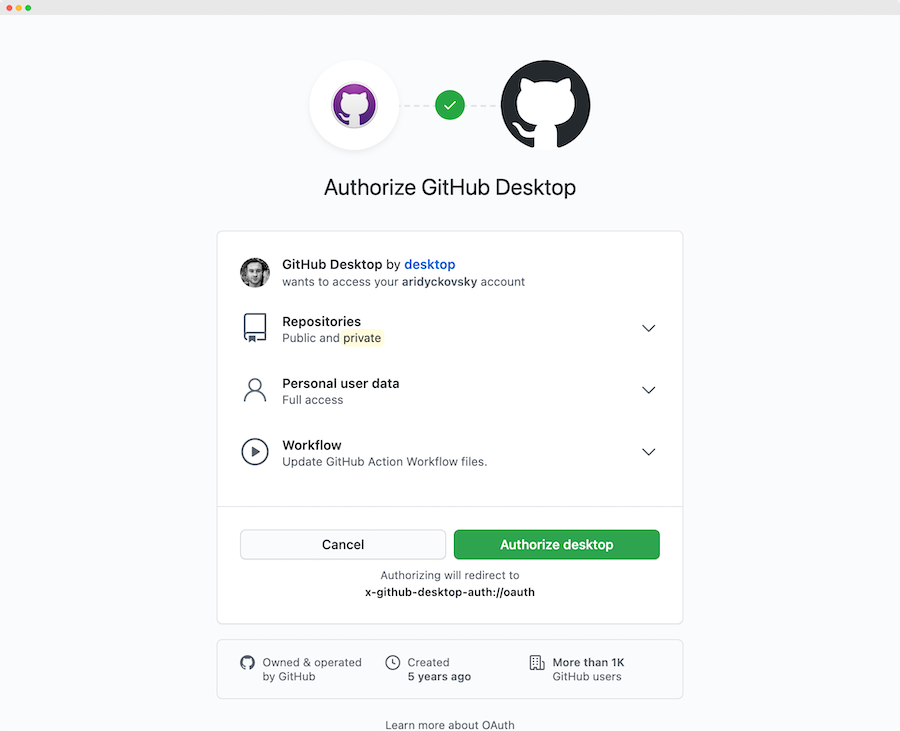
The application will then ask you to either Sign in using your browser or Continue With Browser. Whichever it is, click that button, and your default web browser will be opened to an authorization page on GitHub.com. If you're not already signed in, it will ask you to do so before continuing. The authorization window will look like this screen where the GitHub user @aridyckovsky is asked to give access to his account:

Once you've read and agreed to the conditions of access (you can view these by clicking the drop-down arrow icons), click Authorize desktop. With authentication complete, launch the desktop application (you may be prompted to do so by your browser, and you should take this chance to do so!).
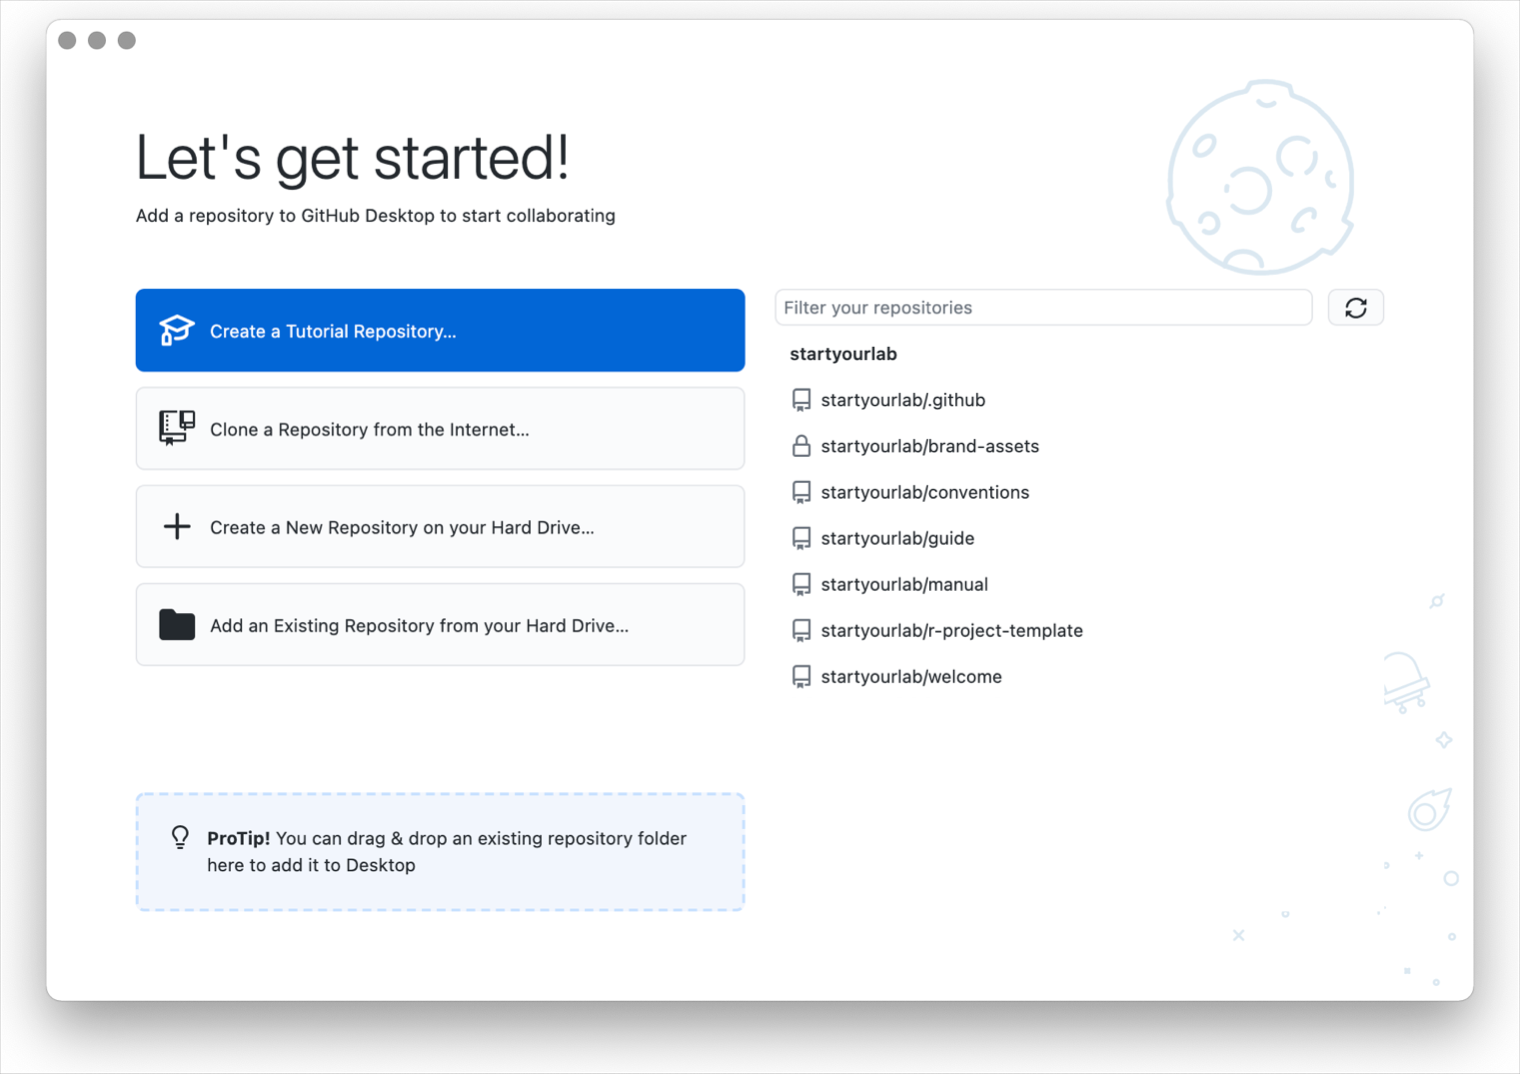
After a successful connection, you will be brought back to the "Let's get started!" screen. If you have already created or contributed to repositories, they will appear on the righthand side of the application window with a text input field to filter your repositories, such as the startyourlab repositories in this screenshot:

If you don't have any repositories connected to your account, that's completely fine. You can learn more about creating and contributing to repositories in a tutorial.
Configure your Git defaults#
- macOS
- Windows
main as the default branch for new repositories.main as the default branch for new repositories.Pick your integrations#
- macOS
- Windows